Wednesday, May 27, 2009

David Jackson @ SJSU

David Jackson demo at SJSU

David Jackson's shop visit to SJSU

David Jackson demo at SJSU
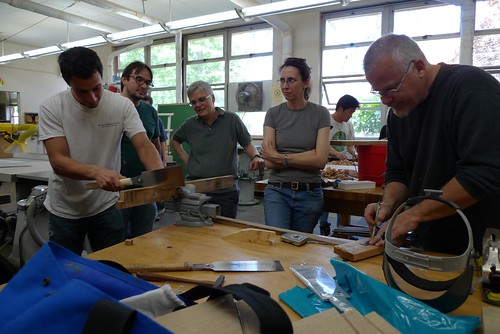
Pavel tries out a Japanese woodsaw as David Jackson marks out a quick joint he wants to demo. Shannon watches wearily, fearing a sudden outbreak of psychosis in our normally chill Mr Rakhlin.

David Jackson demo at SJSU
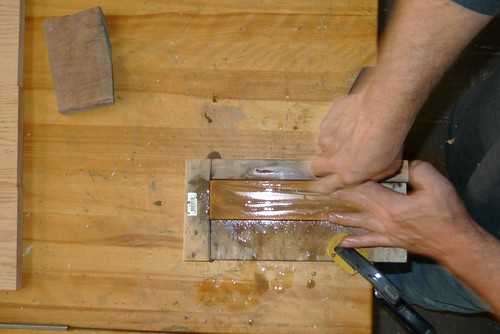
Laura attempts to get a shot of the coveted wet stone sharpening technique...

David Jackson demo at SJSU

David Jackson demo at SJSU

You can check out the rest of the photos, blurry and clear and all on Flickr

Monday, May 25, 2009

Sam Maloof (1916-2009)


Sam Maloof rocking chair


The eminent American woodworker Sam Maloof died just a few days ago at age 93. His work was celebrated for its originality, craftsmanship, simplicity, and elegance. The child of Lebanese immigrants, he was largely self-taught, beginning his woodworking career as a practical way to furnish his and his wife's first house, a simple tract home. He began making furniture out of scraps of discarded fir plywood and oak shipping crates, since they could not afford finished pieces.

Maloof's work was likewise originally valued for its utility, comfort, and functionality, though his freely conceived, even organic designs would eventually be valued as high art. He was the first craftsman to win a MacArthur grant, in 1985, and his furniture was prized by collectors, curators, even presidents. (Jimmy Carter, who visited Maloof at his home in California, called him "my woodworking hero.")


He didn't work from plans, preferring to select a piece of wood and then execute a design that he initially pictured only in his imagination. He made freehand cuts with a band saw to shape the flowing curves that characterized many of his pieces. He was known for his innovative joinery, which never used nails or any sort of hardware. (He once tested the solidness of the joints in a chair he'd built by dropping it off the garage roof: the joints held.) Walnut was one of his favorite materials, though he eventually would come to store more than a half-million board feet of various rare lumbers at his workshop.

Maloof created about 50 pieces of furniture a year, working largely alone. Rather than trying to appeal to a larger audience he followed his own tastes, turning down multi-million dollar offers to mass produce his designs. His home, which has been designated a national historic site, grew gradually over the years into a sprawling property that housed hundreds of his own pieces.


Maloof's home: he added rooms over several decades

Below is a table in a style inspired by Maloof - particularly the direct joining of the legs to the tabletop, which was a Maloof motif. No aprons involved - the tenons are in the tabletop itself.


Q & A with Sam Maloof (from the Smithsonian Magazine)

Where do you get the ideas for your work?
They happen.

Do you work alone on your craft, or with others?
I design and put all pieces together - have 3 co-workers.

Do you ever teach, or take on apprentices?
I give 2 workshops a year for the University of California -Riverside, and also teach at Anderson Ranch, Snowmass, Colorado.

What's the most exciting part of creating your works?
Viewing the end result.

What's the most difficult part of creating your works?
None.

What sort of technology do you use in your work? Has the technology of your craft changed dramatically over the past 100 years?
Common sense. For the true woodworker, not much.

Do you have any advice for somebody just starting out?
Discipline - integrity.

Can you share a "secret of the trade" with us--something nobody else knows or that you found out only after years of experience? Put another way--what do you wish somebody had told you when you were just starting out that might have saved you hours of wasted effort?
There are no secrets. That it was going to be difficult.

What are we missing by experiencing your work through the Internet and not seeing/hearing/feeling/smelling/touching it in person?
Nothing will take the place feeling - touching etc. - but the Internet will let those who cannot attend an exhibit become a part of what is happening.

living wood joinery

one of the extracurricular activities that took up a great deal of my time this semester was grafting, which is an AWESOME phenomena of the plant world that rewards the skilled practitioner with a wider variety of fruit crops or ornamentals than would otherwise be possible.

at its essense, grafting is just the whittling of wood joints (done with live wood of matched size and at a specific time of year). The layer of tissue just below the epidermis (the cambium) is really the only important part of the equation, for this is where moisture, minerals, and sugars are transported within the plant body. If even a small section of cambium is in contact, the plant will be able to repair the damaged tissue along the border and heal the two pieces as one. The moves must be practiced and the tools laid out within reach, for the whole operation must be completed as quickly as possible, preferably in under a minute (contact with the air will dry out the cambium of both rootstock and scion = death).

that said, it's a relatively straightforward process that still doesn't seem like it should be possible. I've got a few years practice, so i went big this year and i completed over 115 grafts of some 40 species. It was a monumental undertaking, and i've been thrilled to watch the dormant buds open up and absolutely gush with leaves, flowers, and woody stems.

i'll have to tend the joints for the next few months to ensure the sealant doesn't open up and dry out the union, but soon enough my yard (and my face) will be covered with apricots, nectarines, plums, peaches, apples, pears, and cherries... yea!

here's a couple links to showcase several types of grafted joinery:

http://www.ces.ncsu.edu/depts/hort/hil/grafting.html

http://www.extension.umn.edu/distribution/horticulture/components/DG0532c.html

salvaging the remnants of ancient forests

in her blog entry last xmas, which is generally hilarious, shannon wrote that "to teach sculpture is to participate in turning valuable materials into waste; sculpture is itself a somewhat environmentally unethical pursuit."

indeed. it is generally unethical to produce non-functional objects from virgin material, especially when it's student work that will likely be discarded or neglected after critique.

but we are not locked in to the cycle of rampant consumption, and as artists (free-thinkers and creatives) we should have the ability, desire, and conscience to adapt ourselves and our ideas to the materials available from salvage and secondhand sources.

thankfully, these wonderful people are here to help us:

http://www.ohmegasalvage.com/Showroom%20Pages/salvage_list.htm

http://www.driftwoodsalvage.com/

http://sfbay.craigslist.org/

http://cache.consumerist.com/assets/resources/2007/06/Freegans%20All%20About.jpg

http://images.google.com/imgres?imgurl=http://pixhost.ws/avaxhome/7e/bd/0009bd7e_medium.jpeg&imgrefurl=http://www.ebookee.com/Art-and-Science-of-Dumpster-Diving_190826.html&usg=__gT0xEyxcGXZQRjVH31H4X6YapEM=&h=300&w=229&sz=33&hl=en&start=55&sig2=GZN0KezP_H_LBboGzyDW0g&tbnid=jwoTfjmj4Z9FSM:&tbnh=116&tbnw=89&ei=H1saStDAKpu8swOq2NTaCA&prev=/images%3Fq%3Ddumpster%2Bscuba%26hl%3Den%26safe%3Doff%26client%3Dsafari%26rls%3Den%26sa%3DN%26start%3D40%26um%3D1&um=1

merry gleaning!

Friday, May 22, 2009

The Tables!

Okay Folks,
I fixed the levels and shrunk the pictures way down in order to post them on the blog. If you want good (hi res) pics, you'll have to email me for them. Congratulations on finishing these with no access to the shop at the end!
And a whopping thank you to Adon and Phil, the best TA's ever. Seriously!
And thanks a ton to Dave for the extremely generous donation of his studio space for several weeks!
Oh, and thanks to all for the "Have fun in Finland" card. I had to hold it up to the bright sunlight at angle to read it, since you all wrote in pencil on dark paper. What was that, Laura-- did you put a teddy bear in a xerox machine and scan him? Well, thanks!

Ali Sajjadi (not quite finished yet)

Anne Taylor

Anne Taylor

Pavel Rakhlin (not quite finished yet)

Nick Gust

David Sandoval (no finish on it yet, still needs some sanding too)

Laura Moll (no finish on it yet)

Andrew Ajemian

Catherine Kirchner

George Ziegler

Jared Aizawa

Nancy Sevier (hey, that's not a table! That's a giant violin chin rest!)

Phil Tuazon (all reclaimed bamboo flooring! Top was trimmed later.)

Robert Hitzeman

Sara Beckton

Sara Beckton

Thursday, May 21, 2009

Good Design Article

http://www.nytimes.com/interactive/2009/05/20/garden/20090521-lupton-interactive.html
There's a table like the Nakashima butterfly-joint tables, but updated, and a lot of other cool stuff.

Wednesday, May 20, 2009

Wood to bronze process

This post is a little off-subject, but since readership is down at this point I'm going to publish it anyway. For anyone who's interested in combining woodworking with bronze casting, I wanted to share the results of using a wood model as a starting point for a casting. (I've been taking Metal Sculpture 169 this term along with our wood class.)

Wax is the traditional material used to create models for casting, but it's also possible to use organic materials such as branches, or synthetic materials like plexiglass. The key is that whatever material you use must 'burn out': the model or 'positive' is encased in a plaster and sand mold, then placed in a kiln for several days at high temperature. While it bakes in the kiln the wax or other source material burns away and leaves a cavity in the shape of your original model. Then molten bronze is poured into the mold to fill the cavity and recreate the original form.

The wood class must have been influencing me because I liked the idea of reproducing in bronze the clean lines, angles, and facets you can achieve with wood, as well as having more control over actually assembling a model or form. (With wax, it can be difficult to 'glue' separate pieces together without bending or deforming some of the components, especially if you are trying to maintain straight lines, sharp edges, etc.

I got different opinions about whether the wood would burn out thoroughly when baked in the kiln. Any charcoal remnants inside the mold would not mingle well with the bronze and would produce an incomplete casting. The type of wood was important: poplar (which I used) was a better bet than a harder, denser wood like oak.

I built the model below using the straight poplar rods you can buy at OSH or other stores in 36" lengths, which come in different widths (1/4", 1/2", 1", etc.). I cut these at various angles using the band saw and miter guide in the wood shop, then sanded them on the rotary sander. (This was back when there was still time to do extra work in the shop.)


Below is the model after gating, which creates the channels through which the molten bronze will flow into the cavity inside the mold that is created during burn-out. Gating a wooden model turns out to be similar to gating a wax model: you can melt and attach the wax tubes directly to the wood surfaces. Gates also provide pathways for the burn-out ash to escape the mold after it's been baked in the kiln. In my case it was important to have a lot of gating (even for a relatively small model), because the wood ash was considered more problematic to evacuate from the mold than wax would be.


Skipping ahead to post-kiln baking and 'pour', the results were pretty good. The wood burned out completely, and there was little 'porosity' in the resulting bronze surfaces, which means the bronze completely filled the cavity left in the mold. There was quite a bit of 'flashing', which is the lacy extrusion of the bronze that extends out from corners and edges of the model, but that's pretty typical even for wax models. Here's the casting out of the mold:


Here it is after 'chasing' (removing the gates, then grinding and polishing the surface), and then again with a basic brown patina applied:


This was a fairly simple model - my goal was to move on to something more complex, but just didn't have time this term - I'm hoping to revisit the process later. I like the idea that you can use the wood as a starting point, because it opens up an abstract and geometric element to the bronze which could be interesting. Didn't get to any of these ideas:


Carving or chiseling the wood would give you other possibilities. Another idea would be to build a wood model, make a rubber mold of it, create a wax version of the model, and cast that. The advantage would be you'd retain the clean lines and sharp edges of the original wood, which could be hard to create from scratch with the wax. You'd also end up with a lighter casting - my small bronze, which is only about 4"x5"x5", is heavy (about six pounds). And bronze is expensive - costs about $5.50 a pound. So the one thing I wish I'd done before casting mine is to drill out the legs with a Forstner bit. Or maybe a chisel... or an Oliver mortising machine... endless possibilities.

p.s. If you're interested in bronze casting there are at least two classes this fall at the foundry, and they need enrollment to keep the facility going.

Tuesday, May 19, 2009

French and English gothic.

Gothic architecture involved radical innovations such as flying buttresses, pointed arches, and elaborate tracery in a general shift from a rounded horizontal orientation to that of a more vertical one. Gothic cathedrals were expressions of a transitory opulence. In stark contrast the the furniture of that time period was rather simple. For the most part the interiors of the churches and the homes of the patrons utilized simple functional oak furniture that was decorated with tapestries and metalwork. The furniture of the 1400's constituted a shift in tastes that favored designs incorporating the pointed arch as well as the use of tracery and arches carved into the panels of chairs tables and chests. The new cathedrals were expressions of affluence, but for their interiors the rich patrons of the church appear to have enjoyed simple, functional oak furniture enriched with tapestries and metalwork. The decorative elements of the Gothic, particularly the pointed arch, were not seen in furniture ornament until about 1400. Then, for more than a century, tracery and arches were carved on the panels of chairs, on chests, and on tables of every size.

In the 15th century the oversized armoire was introduced. These armoires were decorated with the same carved arches columns and foliate patterns as before but the designs were based on the hanging textiles that decorated the homes and gothic cathedrals of that time period. These "linenfold" motifs originated in the Flemish regions and later migrated to England France and Germany where they remained prevalent until around the sixteenth century and often resurfaced in subsequent Gothic revival movements.

here is a link to an interesting account of "Master" William McNaughton's recreation of a 16th century linenfold panel: http://tech.cls.utk.edu/wood/projects/linenfold/Chest.html

For Next Time

The process is a little different with each iteration of the class. All the handouts I made last year were irrelevant by this time, as we have several new pieces of equipment.

Things we need prior to next Woodworking class:
Jointer knives sharpened
Planer knives sharpened
Dedicated rip and crosscut blades for class
New marking gauges
New 3/8" Forstner bits
Make up a big batch of ebonizing solution
Write vocabulary quizzes

Other notes: recommend walnut or cherry over white oak
Make sure students read the PDF posted for the class, entitled "Gluing Up Tabletops".

Table Process
• Joint and plane 8/4 wood for the legs and 4/4 for the aprons and top
• Rip the legs oversize and run through the planer to make them square
• Cut the legs to length with the sliding table and a crosscut blade
• Mark out the mortises (we need new marking gauges)
• Drill the mortises with a sharp Forstner bit,
• Grind and then hone a wide chisel and a narrow (skew the chisel on the Japanese water stone)
• Clean up/ square up the mortises
• Make the crosscuts for the tenon shoulders
• Use the mortising jig to cut the tenons
• Bandsaw the wide ends of the tenons with the rip fence, and fit them to the mortises
• Chisel away any remaining high points
• Glue up the tabletop (need: bucket of water, rags, glue, mallet, paper, pipe clamps.)
• Hand plane while table top is long
• Trim it to size on the sliding table with a sharp crosscut blade
• Taper the legs,
• Make biscuit slots to accommodate the table top mounting hardware,
• Sand all parts with 80 grit, 120, 180 and 220 grit sanding discs and hand sandpaper.
• Give most edges the “Bob Robinson Bevel”
• Glue up the table (need: bucket of water, rags, glue, mallet, paper, pipe clamps or Jorgensen bar clamps. Toothbrush would be helpful for glue removal.)
• Wipe table with damp rag to raise grain and show up glue spots
• Resand everything with 220 grit sandpaper (by hand)
• Apply first coat of finish (I recommend Minwax Wipe-On Poly, satin finish, or Watco Danish oil.) Use plenty of the Wipe-On Poly, and don't "go back in" with the rag after a minute or so, as it will start to get sticky and mess up what you have done.
• The next day, sand entire table VERY LIGHTLY with 220 or 320 sandpaper folded neatly over an MDF sanding block, (do not sand through the first coat!!!) then apply a second coat of Wipe-On Poly.
• Apply the finish even to the undersides of the table legs-- they will take on and lose moisture faster than the rest of the table otherwise.• Install the table-top hardware using ½” #8 screws. Apply masking tape to drill bit to avoid drilling through table top, and screw in screws by hand.
Monday, May 18, 2009


Marcel Breuer/ steel


Alvar Aalto 1928 molded wood

Finnish Archetict, Alvar Aalto designed this Paimio Chair for the Paimio Tuberculosis Sanatorium. 
The chair is based on the tubular steel designs of Marcel Breuer, but Alvar believed his chair, designed in molded wood and plywood, would be warmer and more comfortable and would also help ease the breathing of the tuberculosis patients.
Aalto married Aino Marsio who collaborated in the design work but it is unknown to what extent she was a partner. They went on to begin Artek which manufactured the wooden chairs and stools the two of them designed. Perhaps this summer will take bloggers into creating some bent wood projects. Here is some inspiration...

Sunday, May 17, 2009

What We Learned

Hi Folks
So, our final critique is this Thursday at 12.15.

I thought now would be a good time to compile all our collective wisdom on what went well and what I might change about the course next time. Of course, we endured much externally-imposed hardship this semester: several weeks with no dust-collector, dull planer and jointer knives, limits to how many people could work int he shop at one time, and so on. But let's compile a list of the little things we learned that could be useful in future iterations of this course.

Here's my list:

1) Stick with my guns about having everyone do the same basic project. There just isn't time to consider multiple different table designs. Trying to figure out how to realize these different designs lost us a class period or two, which we couldn't afford to lose.
OKAY, you're right, folks, the freedom was worth the time lost! But yes, there do need to be limits! The problem was trying to explain why several variations did not fit the bill at all, and couldn't be done with mortise-and-tenon joinery.

2) As much as I love white oak, it's much harder to work than, say, walnut or cherry. And, as we learned from David Jackson, the Californian white oak is itself more difficult to work than "Eastern" white oak.

3) Always use the "zero clearance" table-saw insert in combination with the tapering jig, to avoid scraps getting caught in the insert.

4) We should have a class-specific crosscut blade for cutting the shoulders on our tenons, etc. Some people managed to check out the sharpest blade while some people got a dull blade which resulted in tearout.

Exciting new things:
It sounds like we will be getting a new (old) Oliver mortising machine for the shop. This is the same machine the Kentucky woodworker in one of our videos, used! This might knock about two weeks off any future projects involving mortise-and-tenon joinery! It will also virtually eliminate the whole chiselling component of the assignment, which means also the chisel-sharpening component... kind of sad, yet most people won't think so.

Okay, please add your own suggestions here.

Sunday, May 10, 2009

Jack Rogers Hopkins

I saw this chair at the Museum of Fine Arts in Boston a couple of years ago and thought it was pretty cool... I wondered how it had been done. I wrote down the name of the artist, Jack Rogers Hopkins, but never read anything more about him (until now).


Edition Chair, 1970. Honduras mahogany, 28 x 54 x 28 in. Created in Spring Valley, CA

The chair, which is in the MFA's permanent collection, was originally shown there as part of a 2003 exhibit, "The Maker's Hand: American Studio Furniture 1940-1990". This was the last exhibit of any of Hopkins' work.

Here's some biographical information on Hopkins from the antique dealer Todd Merrill:

Hopkins (1920 –2006) was part of a California-based design movement in the late 60s that introduced more sculptural and free-flowing elements into furniture design. He grew up in Bakersfield, California, and as a young boy learned to make toys in his father’s wood shop, the Sierra Furniture Manufacturing. Co. After WWII, Hopkins attended the California College of Arts and Crafts, where he studied painting and drawing. After graduating in 1950, Hopkins earned his MFA from the Claremont Colleges, and in 1960 he began teaching in the art department at San Diego State University, where he remained an influential teacher until his retirement in 1991.

Hopkins started out as a painter, then experimented with jewelry and ceramics. He began working in wood around 1965, and completed his first furniture piece, a combination chair and coffee table, in 1966. He continued to produce furniture pieces, all of which were one of a kind, with the exception of the Edition chair, first created in 1969. He usually worked with hardwoods such as black walnut, cherry, Honduras mahogany, maple, rosewood, and teak. He also used Finnish birch plywood and veneers, and occasionally oak. Hopkins often combined various woods into a single piece so the different grains created a dynamic color pattern and form.

Another piece:

Rocking Chair, circa 1970-1979
Laminated walnut, 37 in. high

Hopkins is included in a survey of 26 furniture makers, designers, and decorators called "Modern Americana: Studio Furniture from High Craft to High Glam" (Rizzoli, 2008). In a blurb about the book, Merrill writes that although some members of the studio furniture movement are well known, such as George Nakashima and Paul Evans, others (like Hopkins) remain obscure, despite their pioneering contributions.

"This is the only undocumented period left in American furniture," said Merrill. "You could graduate from any design school in the country and you might not know who the biggest furniture designers were 20 years ago. They've just vanished."

Well, the Hopkins chair above is not so obscure that it didn't make it onto the list of 99 strangest chairs. Here's a sample, the 'Fat Eames Chair':


Wednesday, May 6, 2009

cutting

Well, David Jackson was super cool, but I was expecting a little more of this kind of stuff...


Maybe next year...

Sunday, May 3, 2009

This Week

Hello Woodworking Class.

I just wanted to remind you that our visiting artist, David Jackson, will be doing the Tuesday night lecture this Tuesday from 5-6PM in room 133. It would be a real drag for him to give his demo on Wednesday without everyone having seen his lecture the night before. If you will be in class, please ask your instructor for permission to attend the lecture. If you are lacking any blog entries still, this would be a great opportunity to make one up.

I helped people in the wood shop for two hours on Thursday and four hours on Friday and I believe a good deal of progress was made. Tomorrow I will demo putting biscuit slots in the apron rails for the tabletop hardware, as well as random-orbital sanding. As soon as someone is finished sanding their parts, I will do a demo on gluing up that person's table.

For anyone who has missed a lot of class periods: please remember, "incompletes" can not be given unless a student has completed 75% of the course work with a C or better, and has had some kind of unfortunate event befall them in the last three weeks of school. Meaning, you have these two weeks to finish your table.

I will plan on helping students in the shop this Thursday, but I have to attend the Graduate "first year review" all day Friday, so please get your more difficult questions answered before Friday.

Thanks, and see you tomorrow.